Context Engineering #
The quality of an LLM response does not just depend on the suitability of our instruction. What’s even more important is whether the LLM has access to all the information it needs to perform our task. Bringing together all this information is what we call context engineering. In this chapter we’ll explore where the LLM’s context comes from, and how we can manipulate it.
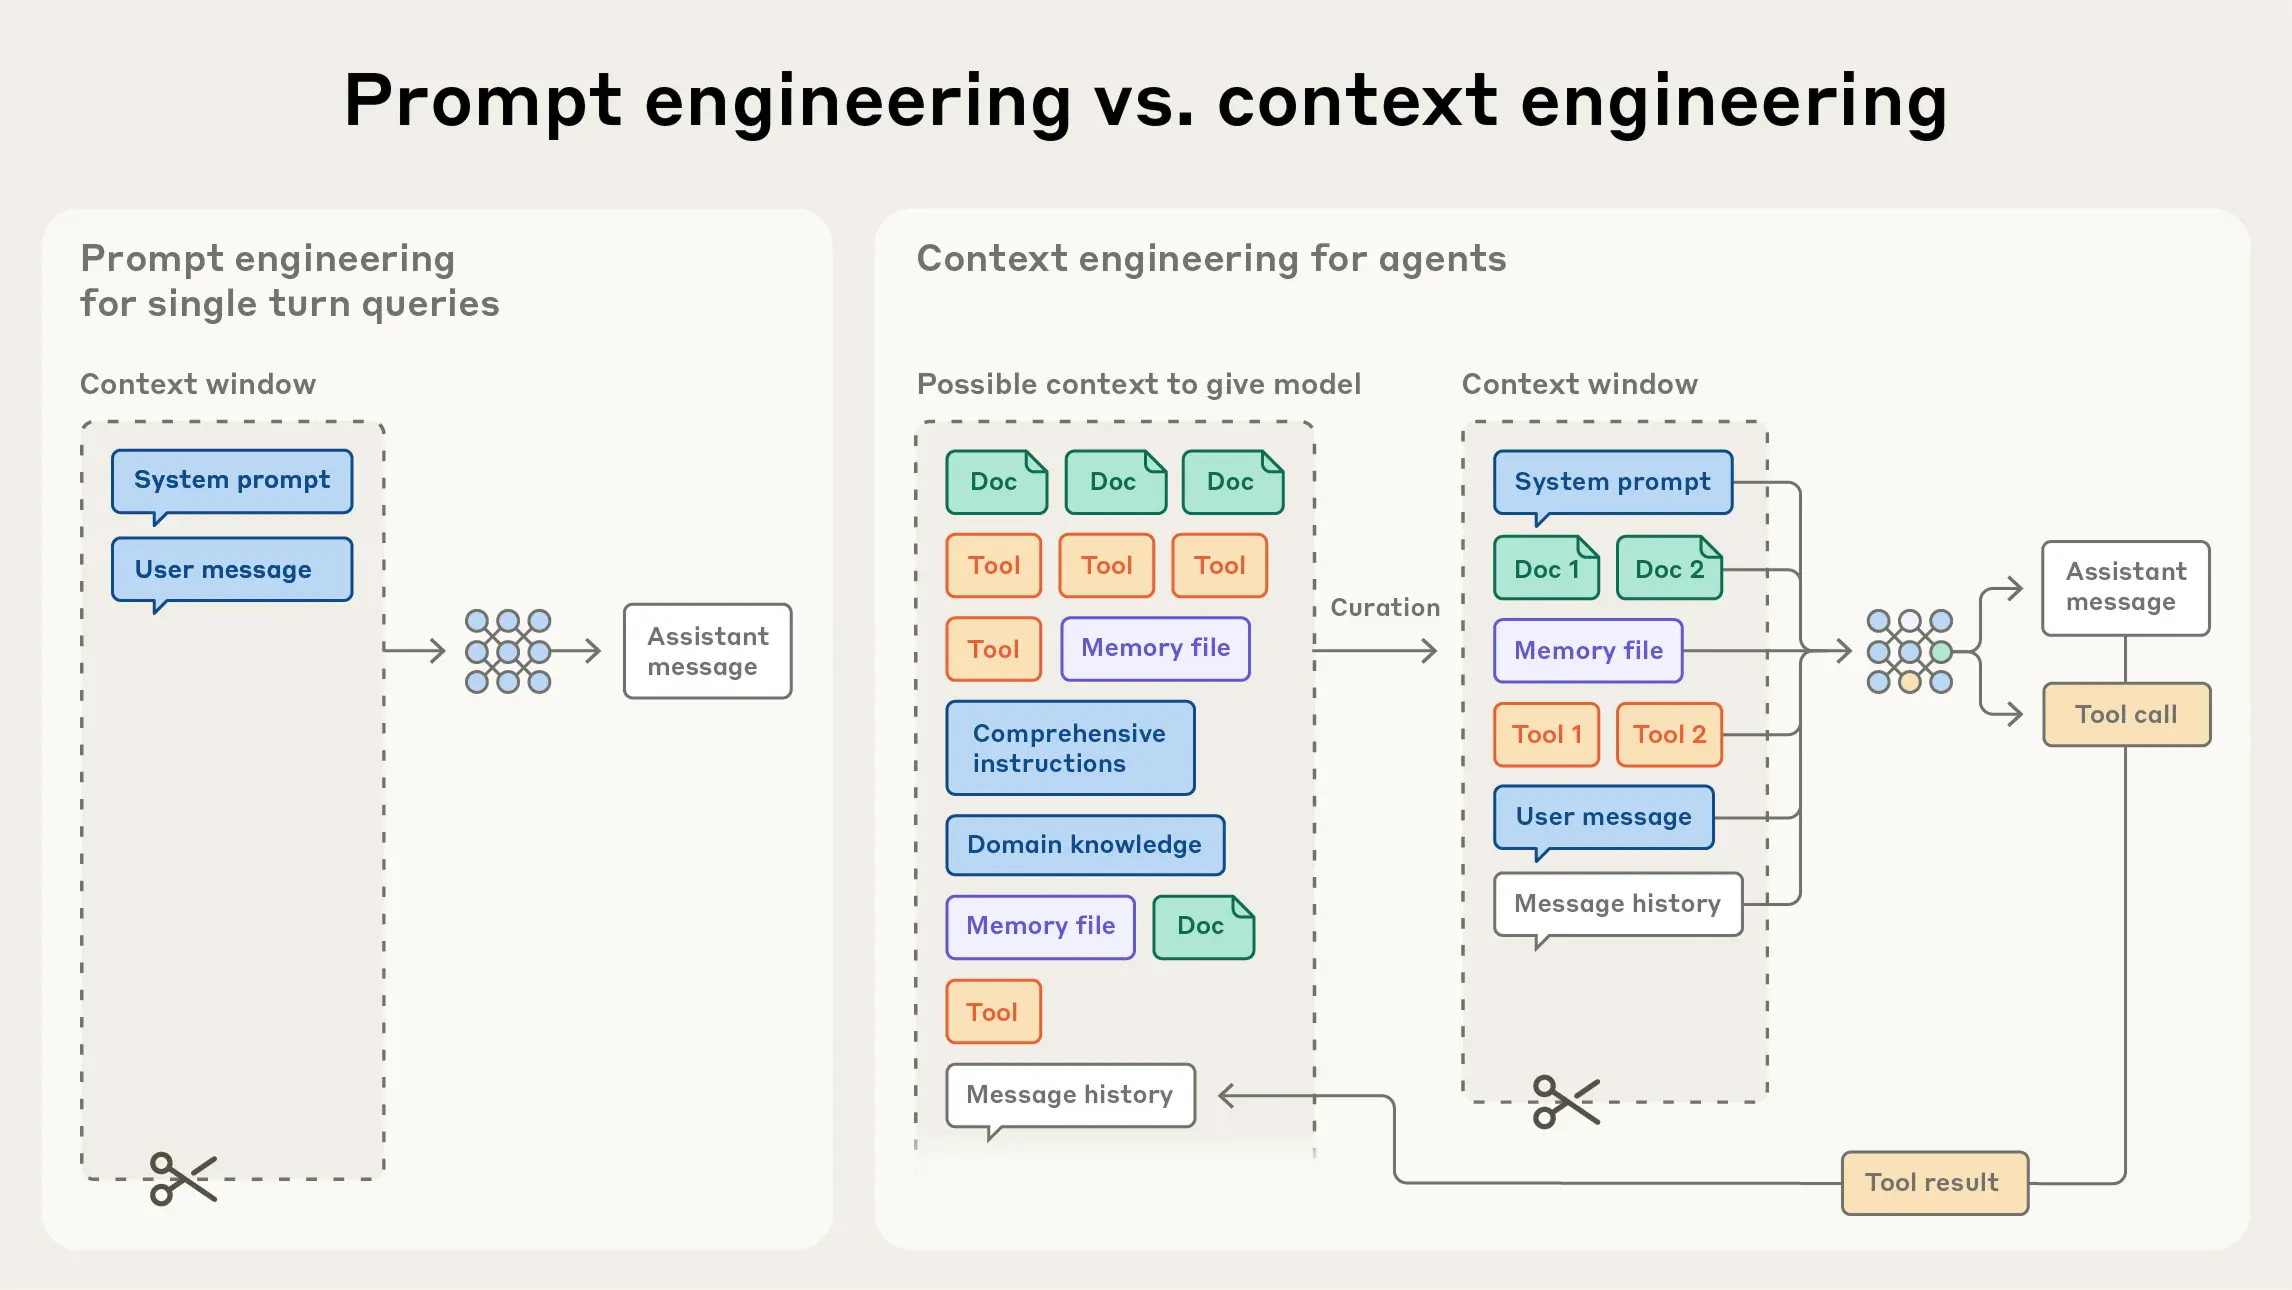
Context engineering is the task of assembling the optimal context for an LLM to fulfil a task.
(From Effective context engineering for AI agents, by Anthropic)
Isolate tasks #
Tip: Start a fresh conversation for every new task.
The first principle of context engineering is that you should isolate independent tasks as much as possible. In a chat interface, this means you should start a new conversation for every task that is significantly different.
Reason 1: Avert context cut-off #
In the early days of LLMs, this was non-negotiable, as context sizes were very limited. For example, GPT-3 and GPT-3.5 had context windows of 2,000 tokens and 4,000 tokens, respectively. This severely limited the amount of information users could add to the conversation. It also meant that after a few thousand words, the chatbot would start to forget the start of the conversation. Luckily such short context windows are a thing of the past. Today, GPT-5 accepts a maximum of 272,000 input tokens and can generate another 128,000 tokens on top of that. Google’s Gemini 2.5 Pro even has a context window of 1 million tokens! For everyday conversations, this is more than enough.
However, users still need to be aware of this context window. Even 272,000 words is a limit you can reach fast when you are working with large collections of documents: you can’t just upload all the personal documents on your computer and start asking questions about them. For this type of applications, there are other solutions, like retrieval-augmented generation, where the chatbot is connected to a search engine and is able to select only those documents (or document sections) it needs to fulfill a particular task.
Reason 2: Prevent contamination #
But there are other reasons to start a new conversation as well. First of all, this protects the model’s output from contamination (in content, style or tone) by prior, unrelated parts of the conversation. For example, when you were writing an informal text yesterday but need to write a formal text today, it’s best to start a new conversation to prevent leakage of informal language from your context into your new task.
Reason 3: Avoid context rot #
What’s even worse, the performance of even the best models is known to degrade significantly with longer context — a phenomenon we call context rot. Researchers at NVIDIA (Hsieh et al, 2024) observed that this “real context size” of a model is often much smaller than its theoretical context window. This is true for all tasks, but it is especially relevant for “linguistic” tasks where the output of the model must be faithful to the input, like translation, rewriting or editing tasks. For example, researchers at Trychroma prompted LLMs to replicate a sequence of words, where all words except one were identical. They found that models started struggling with this task at fairly short context sizes already — between 100 and 1000 words. For other tasks as well, they found LLMs often failed to follow instructions with very large contexts, or got distracted by irrelevant parts of the input. An et al. (2025) attribute this to a lack of training for cases with a large distance between the response and the relevant tokens in the prompt.
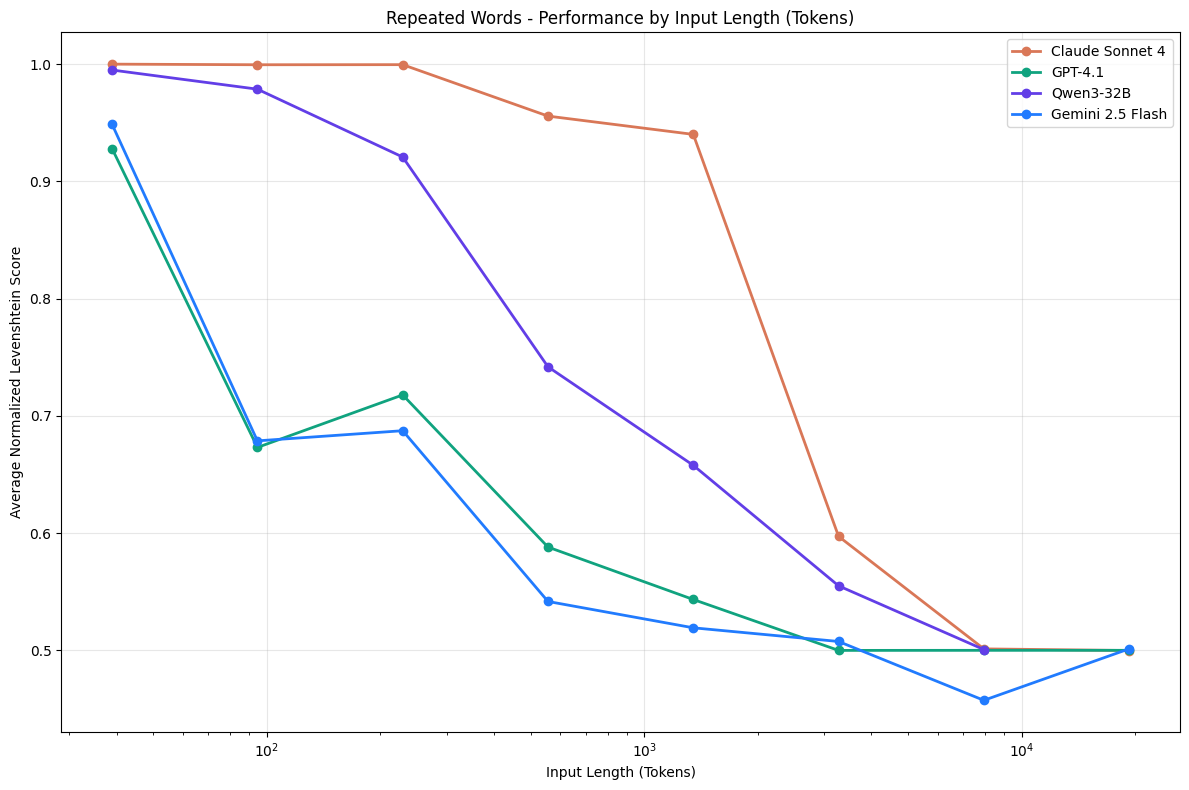
Many LLMs fail to replicate a series of words even with fairly small context lengths (Source: Trychroma)
Give examples #
Tip: Give examples of similar tasks and optimal responses.
For specialized tasks, consider adding examples to your prompt. This is what we call few-shot prompting. Whereas simple zero-shot prompting techniques simply present the LLM with a question or an instruction, few-shot prompts include one or more examples that illustrate both the task and its solution. Such examples often help the model produce more accurate and consistent responses, and they can also enable it to handle more complex tasks that it might not interpret correctly from instructions alone.
Of course, not all examples are created equally. As the prompting guide by Anthropic, the developers of Claude, points out, the best examples are:
- relevant: they must reflect actual use cases.
- diverse: they cover a variety of cases, including edge cases.
- clear: they are set apart form the rest of the prompt, for example by wrapping them in
<example>tags.
In a detailed study of few-shot prompting, Min et al. 2022 found that even incorrect (but relevant) examples can give the model helpful information about the range and format of possible answers!
Since the advent of LLMs, social media have been alive with screenshots of seemingly simple instructions that LLMs struggle with. One by now classic example is counting the number of r’s in a word like strawberry or cranberry. Indeed, if we ask GPT-4o how many r’s there are in cranberry, it often (but not always) answers two instead of three. This is one case where few-shot prompting helps: if you give a few examples of correct answers, GPT-4o is far more likely to answer correctly. Note also that its response follows the structure of the examples in the prompt.
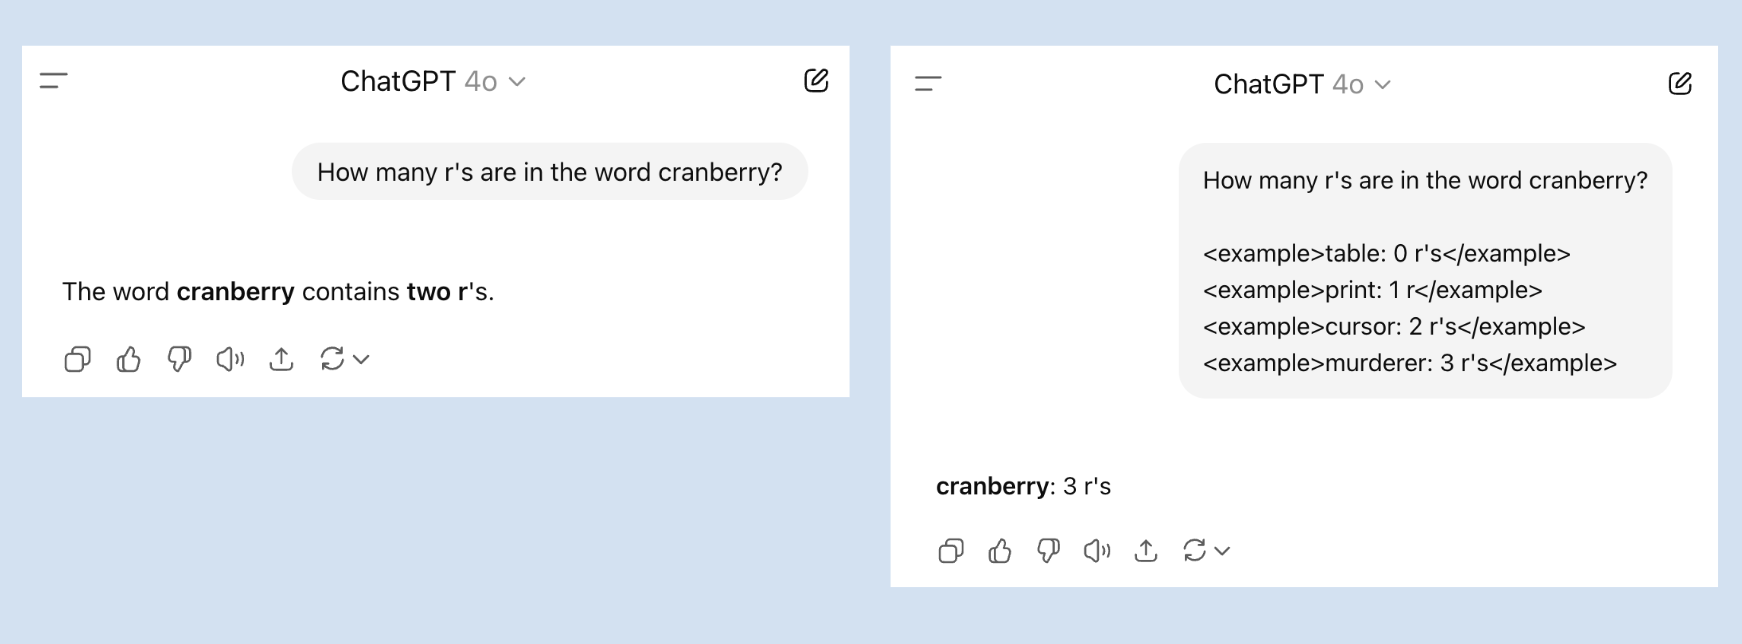
Few-shot prompts help LLMs solve tasks they might struggle with otherwise.
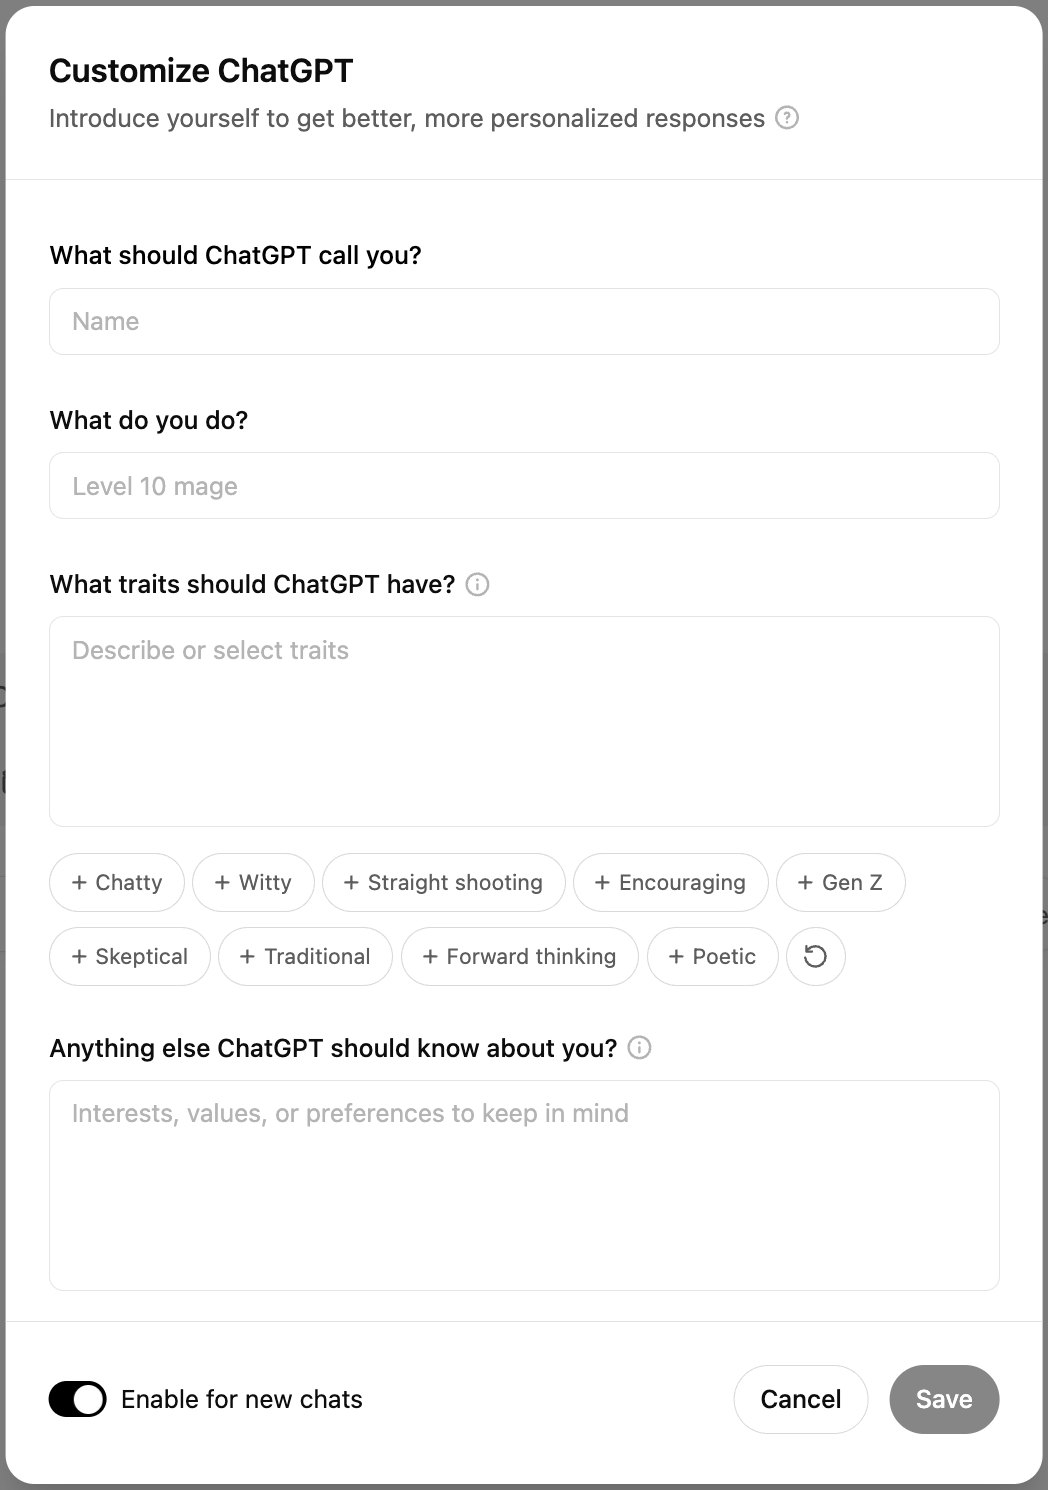
Customize your chatbot #
Tip: Use custom instructions to inform the chatbot about your preferences.
More and more chatbots allow people to specify custom instructions: information about your life and preferences that help the chatbot give more helpful responses. For example, you might inform the chatbot that it should always answer in a particular language, that you prefer short answers to verbose ones, that you’re a vegetarian and it should never suggest recipes with meat, or that it must resist its urge to use em dashes — something Sam Altman seems particularly proud of.
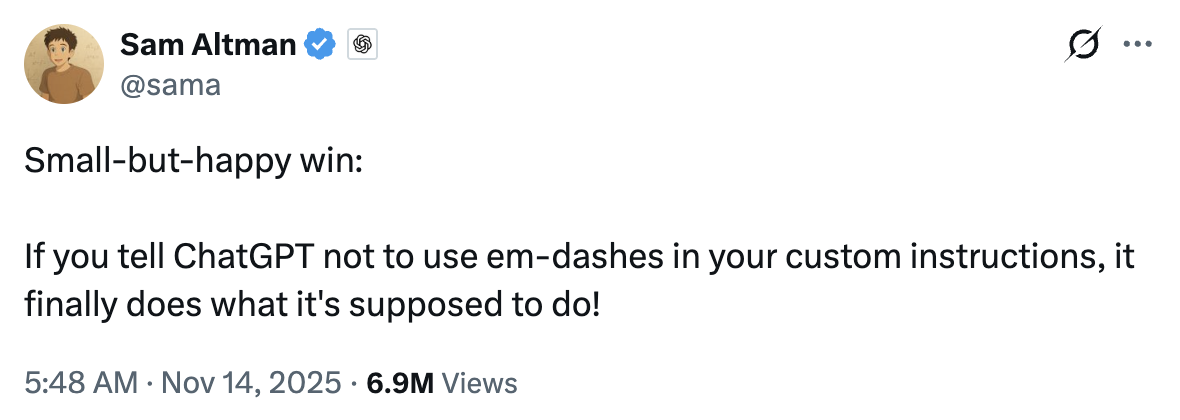
In your custom instructions, you can tell ChatGPT not to use em dashes.
Custom instructions go by different names. Gemini calls them Instructions for Gemini, for example, and Claude’s Settings menu just asks what personal preferences it should consider in its responses.
Nevertheless, they all work in a similar manner: the instructions are added to the start of every conversation, after the system prompt. In this way they become part of the context
of the LLM and you don’t have to repeat these preferences in each and every user prompt.
Custom Instructions allow you to customize the responses of the chatbot.
Claude’s styles and skills #
Claude has another tool similar to custom instructions: styles.
There are four standard styles — normal, learning, concise, explanatory and formal — but you can also add your own.
You can create a custom style by clicking Create & edit styles below the list of styles. Claude offers two options: you can either define a new style by uploading a writing example, or you can describe the style. If you click Describe style instead you’ll see a menu reminiscent of ChatGPT’s Custom Instructions. Here you can define the objective of your style, its intended audience, its voice and tone, and other general information. When you finally click Generate Style, you can give your style a name and you can select it whenever you want Claude to use it.
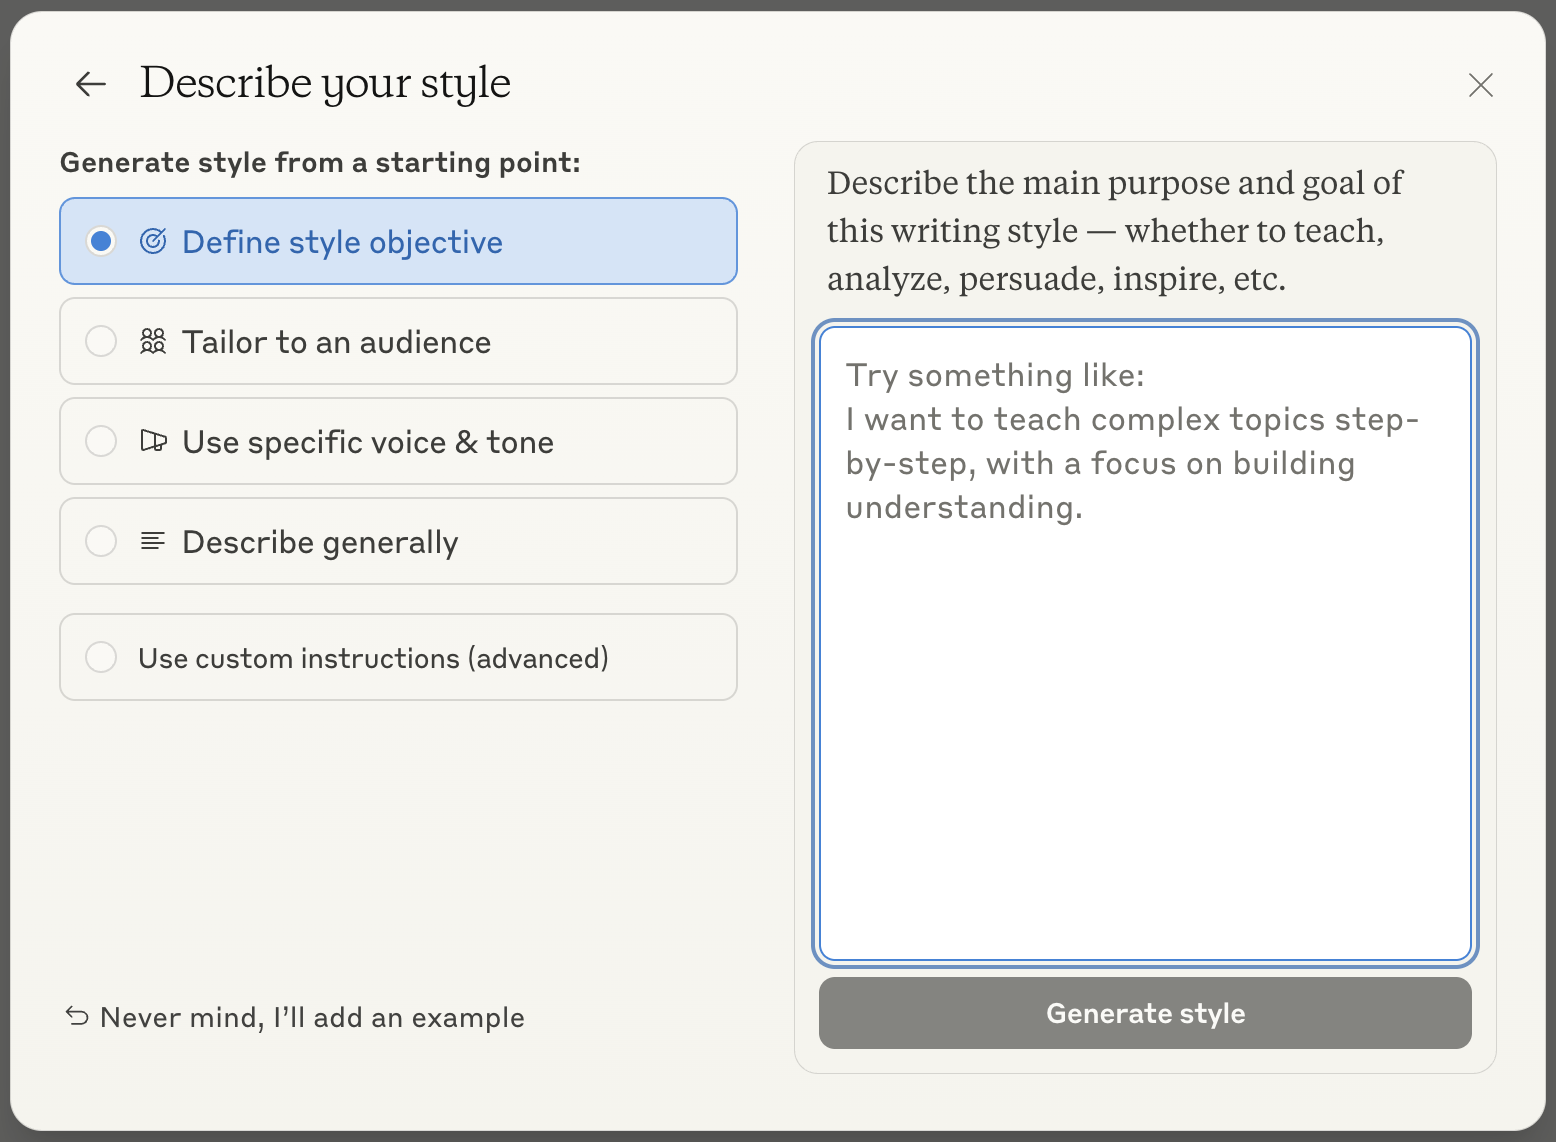
You can create a custom style for Claude by defining its objective, audience, and voice & tone.
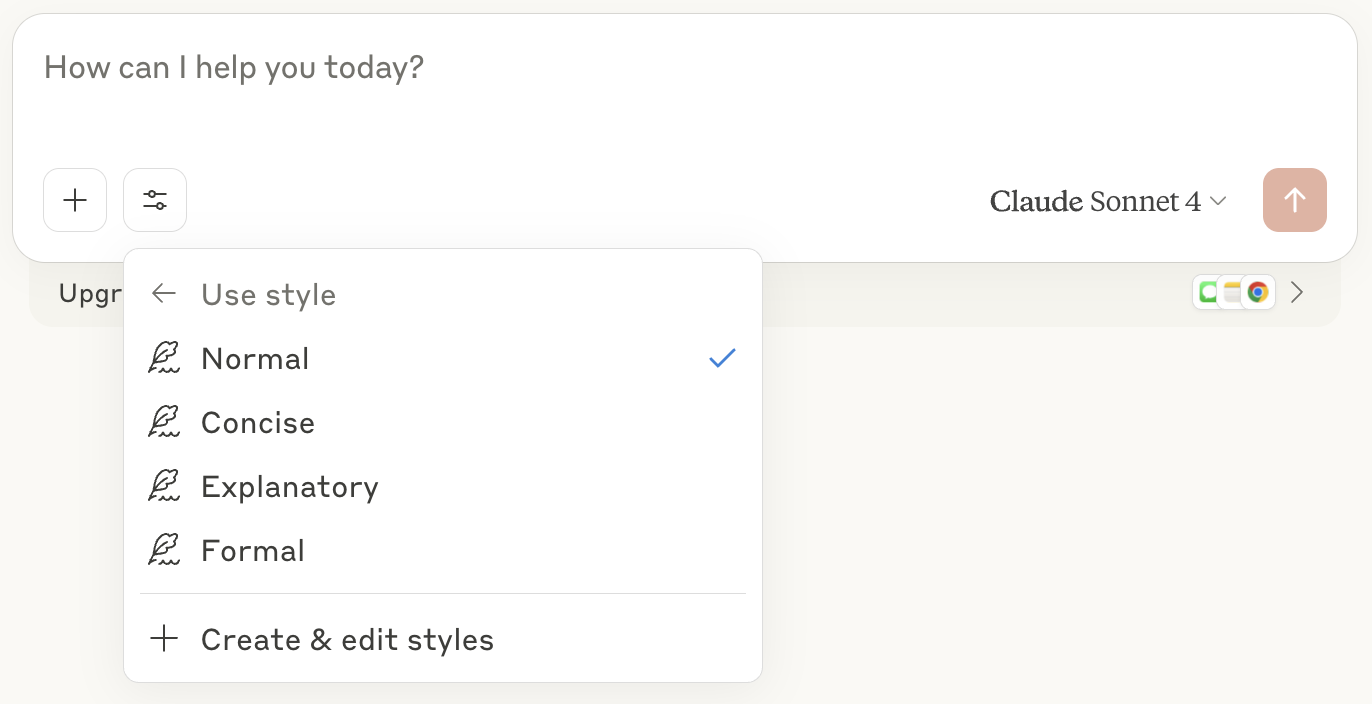
Claude allows users to change the style at every turn of the conversation.
Finally, if you’re a paying user, you can extend Claude with skills. Skills spell out the additional knowledge Claude needs or the workflow it should follow to perform a particular task. Each skill should focus on a particular task: it should define when it can be used, have clear instructions, and include examples when useful. You can think of these as specialized prompts that Claude can rely on when it needs to perform a repetitive task.
Claude allows users to define skills to handle complex tasks.
ChatGPT’s custom GPTs #
ChatGPT, too, has a unique way of customizing its output: you can create a custom GPT. Clicking GPTs in the sidebar will take you to the GPT store, where many organizations and developers offer their own GPTs. These are optimized for particular tasks like image generation, creative writing, academic research, writing a CV, etc. This generally means that they work with a specialized system prompt, have access to custom uploaded files, or use online sources (like for example research databases or weather forecasts) that the standard ChatGPT does not have access to.
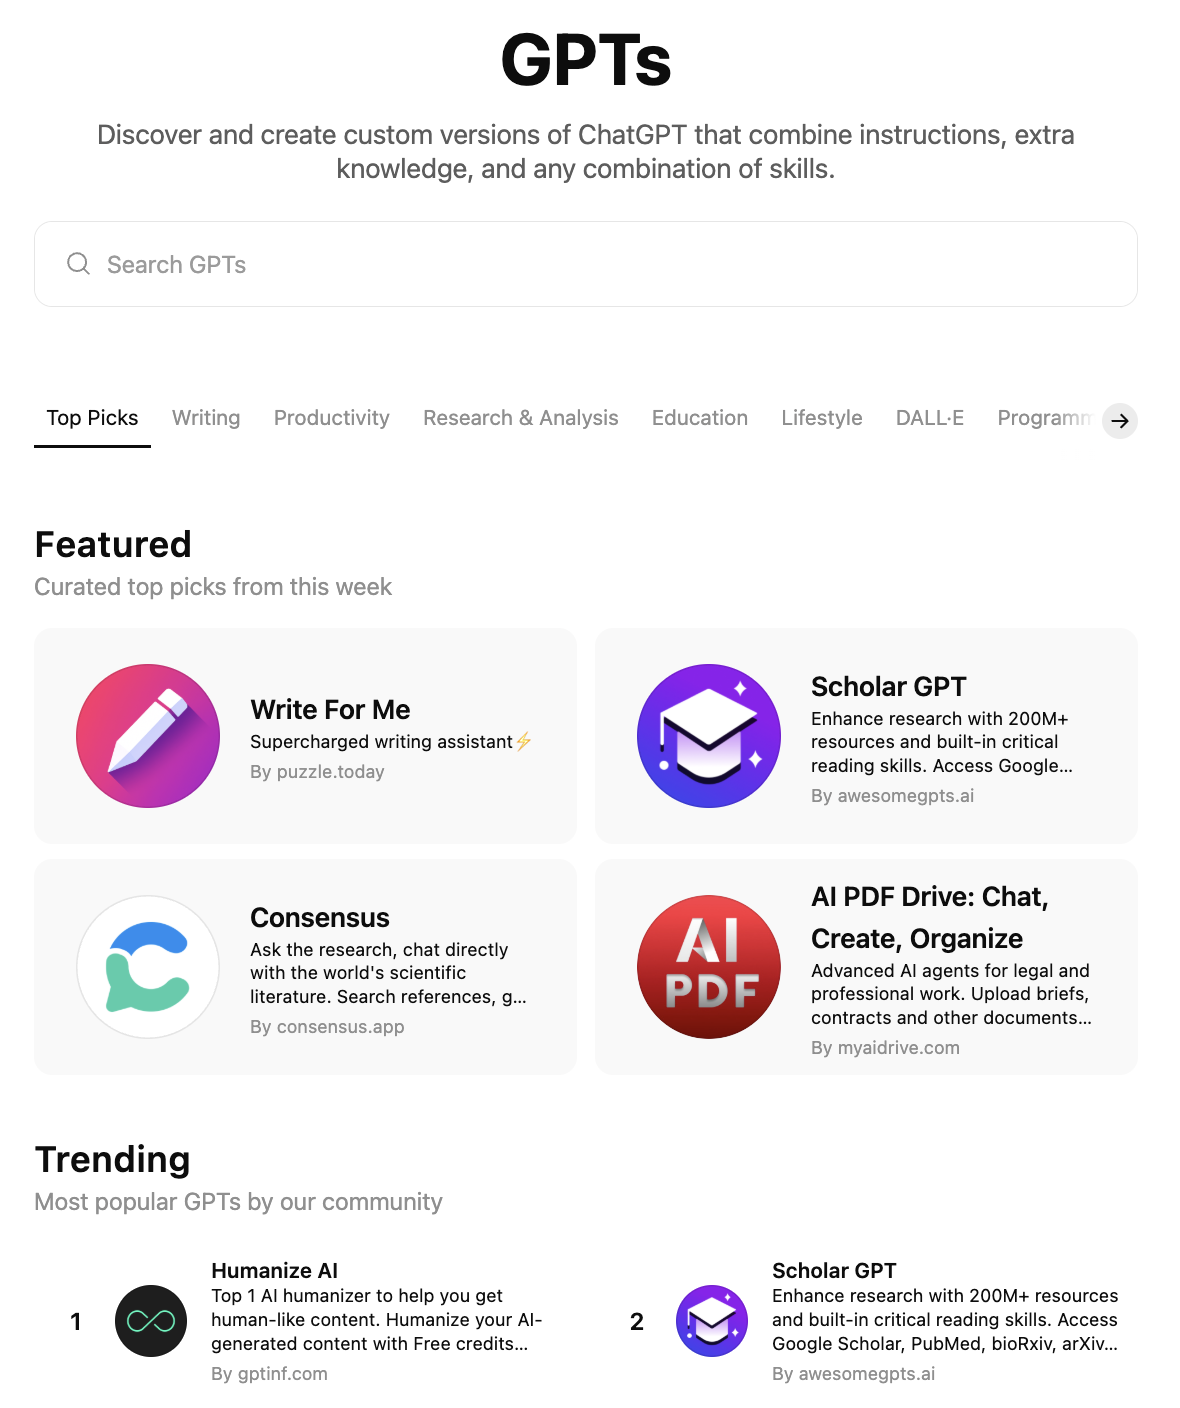
The GPT store has a wide variety of custom GPTs for many different tasks.
You can create your own custom GPT by clicking + Create in the upper right corner of the screen. The software will then take you through a conversation in which you can give your GPT a name, specify the task it should excel at, the conversational tone it should adopt, etc. You can also equip the GPT with tools like web search or image generation, select the LLM it should use (or leave this choice up to the user), tweak its system prompt and upload any files that the LLM should have access to.
When you use ChatGPT in many different contexts, custom GPTs offer the most compelling way to tailor your experience. You can set up a custom GPT for your different professonal projects (each with their own style and relevant documents), your hobbies, etc. Moreover, you can share your GPTs with other users as well. This is an easy way to let people ask questions about a report you compiled, a manual you wrote, and so on.
Organize your work #
Tip: Organize your work in multiple projects with different custom instructions.
One important limitation of the standard custom instructions is that they apply to all your conversations.
This means you can only use them for information that is true in all your conversations indiscriminately.
For less general, more task-specific preferences, there are better solutions.
ChatGPT and Claude, for instance, allow you to organize your conversations in so-called projects, to which you can add project-specific instructions.
Claude’s styles are even more finegrained and can be varied for every instruction.
ChatGPT and Claude allow users to organize their work in projects with project-specific instructions.
Manage your memory #
Tip: Where possible, manage what chatbots remember.
Most recently, the major chatbots have been extended with an additional context feature: memory. This means they have access to select information from previous conversations. ChatGPT’s memory can be accessed by clicking your name, and again Personalization. In this menu you can toggle two memory settings: the chatbot can Reference saved memories or Reference chat history.
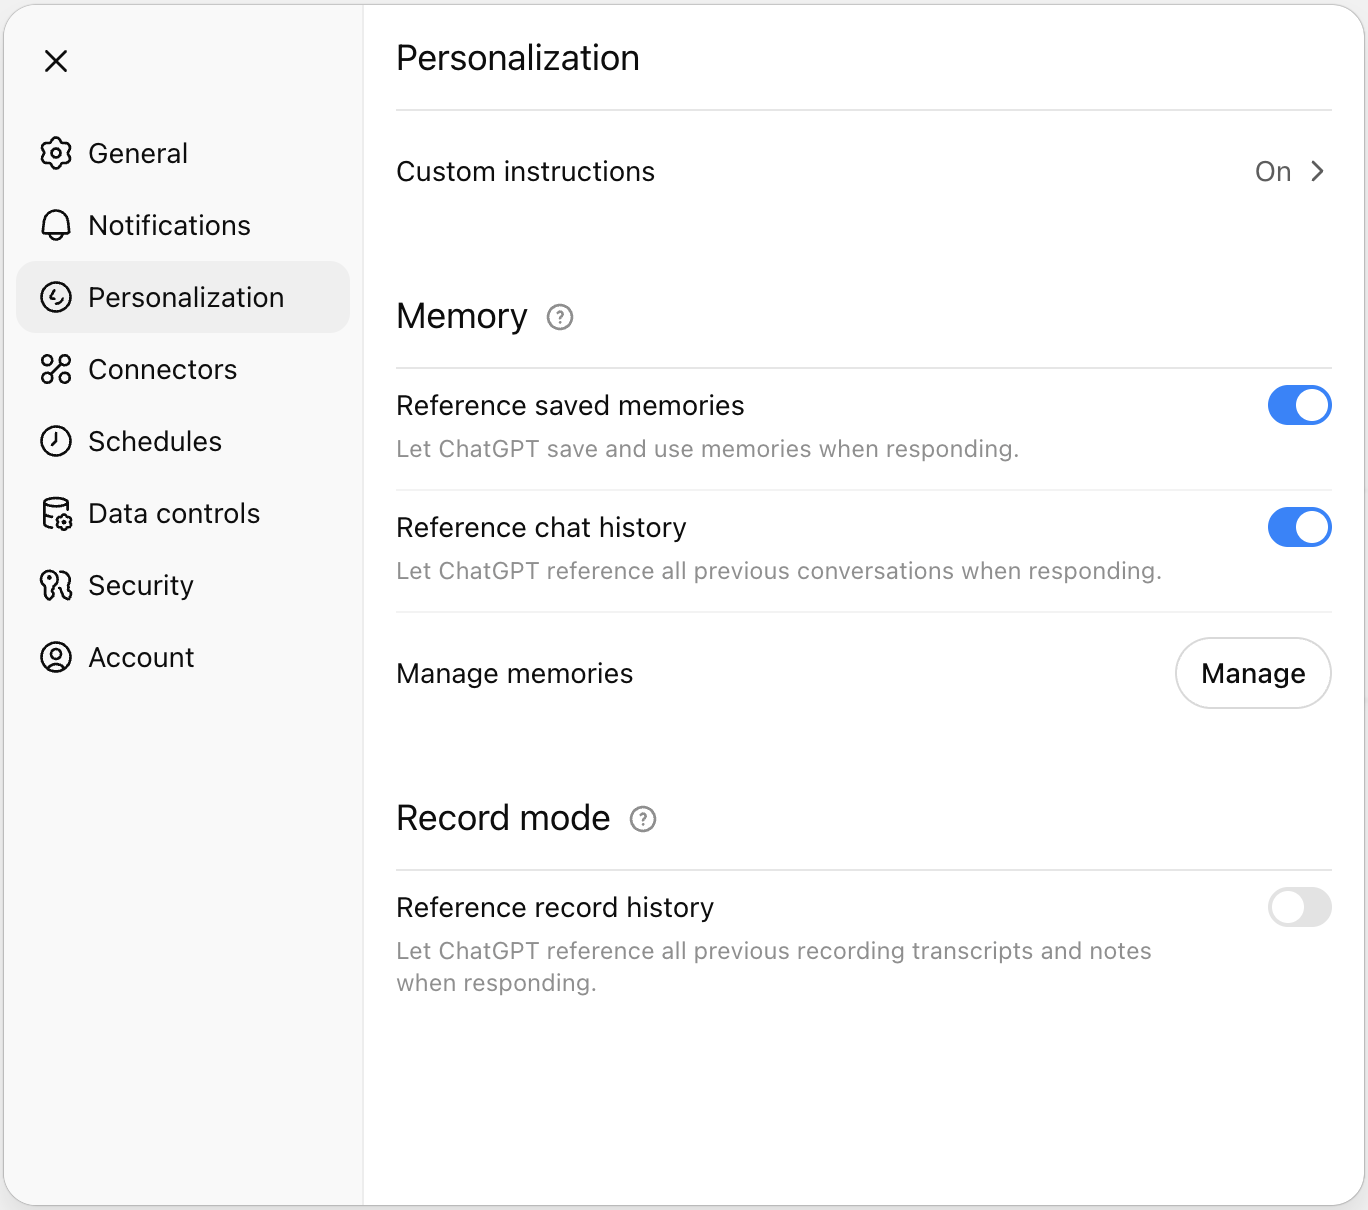
ChatGPT builds a memory that it can reference in later chats.
Saved memories are personal details that ChatGPT stores during your conversations. These can contain your age, occupation and hobbies, preferences and interests, etc. Whenever the chatbot is writing something to its memory, you’ll see the message Updating memory. It can do this without you asking, but you can also trigger this action by explicitly prompting it to remember something: “Remember that I only read books in Dutch.”
A big advantage of saved memories is that you can control them. If you click Manage in the Personalization menu, you can review all memories and delete the ones you don’t want the chatbot to remember. It’s best to go through these memories now and then, as ChatGPT is not very consistent in its choices: some items will indeed contain useful information about you, but others will only be relevant to a task you performed months ago and not be useful anymore.
Chat history is more of a black box. Instead of relying on a short list of saved memories, ChatGPT and Claude also keep a database of all your previous prompts and responses. Whenever you enter a new prompt, they will search their database for the most relevant past messages and add those to the conversation. In this way the chatbot can reference that information to make its new response and useful to you as possible. Unfortunately users have less control over this feature: the only way we can exclude a conversation from chat history is to delete it altogether.
The Attention Mechamism #
Large Language Models can handle context so well because of the so-called “attention mechanism”, a crucial component in their architecture. In fact, the paper that introduced the transformer — the type of neural network that underlies most LLMs today — is titled Attention Is All You Need (Vaswani et al. 2017). Thanks to this mechanism, LLMs can ingest large contexts and focus on exactly those tokens in the preceding conversation they need for their response.
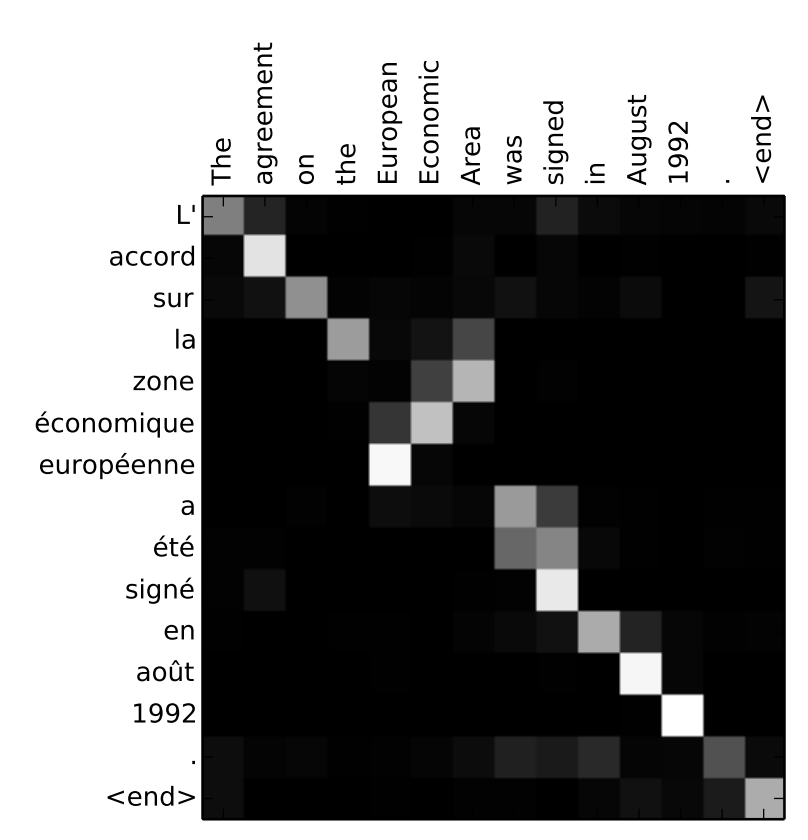
The attention mechanism was originally developed for machine translation. Bahdanau et al. (2015) found that adding attention to a neural network enabled it to translate much better between two languages. For example, the figure below shows the distribution of attention when a neural network translates an English sentence to French. As it generates the French sentence word by word, mostly its attention is focused on the single word with the same position in the English sentence. However, the attention mechanism allows it to correctly reverse the order of the words in European Economic Area and translate the two-word English verb phrase was signed to its three-word French counterpart a été signé. In a similar way, an LLM will use its attention mechanism to single out the parts of the conversation that are most relevant for its next response.
The attention mechanism allows a neural machine translation system to focus on the words it needs most during its stepwise translation. (Source: Bahdanau et al. 2015)
Sensitivity to Context #
Still, the attention mechanism is not perfect. Processing long inputs demands more computation, and irrelevant information in the earlier conversation can distract the LLM. Moreover, there are strong indications that LLMs do not give equal attention to all parts of the context. In a study by Liu et al. (2023), GPT-3.5 was prompted with a question alongside 20 short documents, one of which contained the answer. The model’s accuracy followed a clear U-shaped pattern: the LLM performed best when the relevant document appeared near the beginning or the end of the prompt. When it was near the middle, the model’s accuracy was even lower than in a closed-book setting where no documents were provided at all!
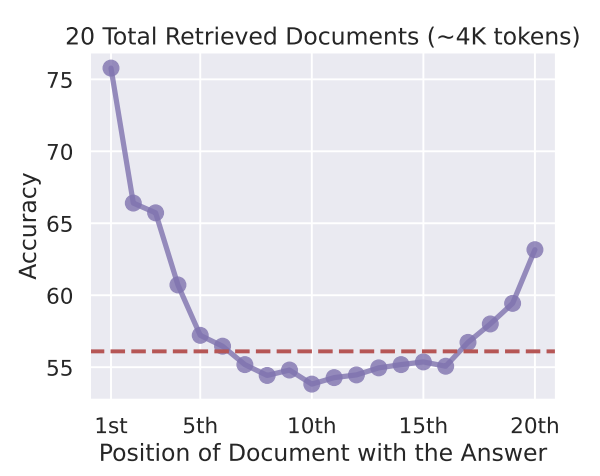
GPT-3.5 proved best at answering a question when the document with the correct answer comes either early or late in prompt.
(Source: Liu et al. 2023)
Conclusion #
In other words, context engineering requires a careful balancing act. On the one hand, we need to give the LLM access to all the relevant information it needs to perform a task well. On the other hand, we shouldn’t overload it with irrelevant or distracting content, because then its performance might suffer.